Tuesday 28 June 2011

Hatsune Miku Wig ^^

After long search I finally found a right colour for Miku's wig. It arrives a while back, and I already used it for few expos. Mainly this wig is meant for Sandplay of the Singing Dragon as it's curly.
This is were I got mine --> here

I apologize for this poor lightning, my bedrooms is quite dark,
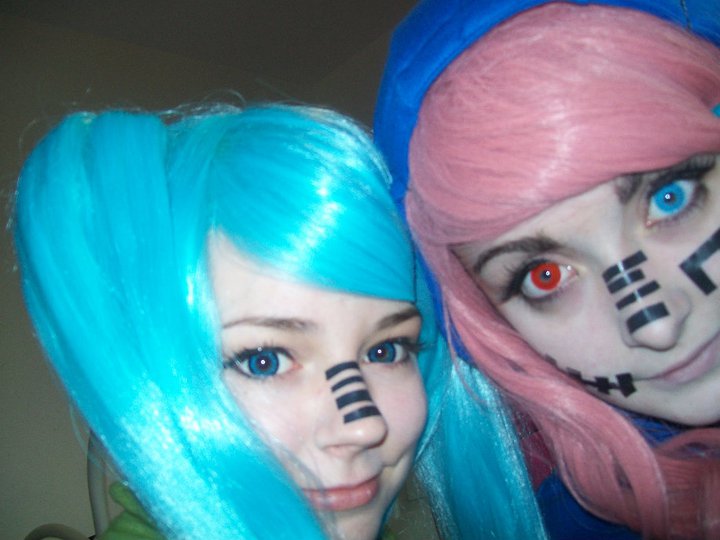
Now for some pictures ^^ 

Miku :D oh, she's so cute 
The base wig :D I had to style it a bit.
As you can see it's not perfect as I need my sister to wear it so i can cut the fringe properly. 
Right now the sides are fixed with hair-spray, otherwise the curl towards my chin. 


Bad lightning again >.< 
The top, you can see the clip in ponytails :D 


I tried to clip the ponytailes at the same level and the same distance away from my ear and forehead. 
As you can see the curls start around just below my shoulders. 


Here you have a better view of the curls. Each ponytail is one big curl, and can be easily split into more.  

 This wig is actually longer then Miku's hair in Sandplay, as it reaches my waist, and I'm a 160cm tall :D 


Here is what the colour is actually like. I used flash that's why it's so shiny >.< 


Me with my Ichigo plushie and Ichigo poster (bleach lover) :L 


Overall I think this wig is very good quality and I was very surprised with it; I was expecting something  worse than that. I paid around £25 together with P&P. 
Absolutely love it <3 


Love Ola ^^

Monday 20 June 2011

Sandplay singing of the dragon, Miku Hatsune, planning of the cosplay

The first picture is Miku's original dress and the second  is a sketch of what I want my cosplay to look like. I drew it in my Maths lesson xD


I know this isn't what the original Miku's dress looks like, but I think that this skirt suits the cosplay more. The dress is going to be more puffy then the picture, but I just wanted the basic idea of it. The inside and the outside of the dress are separate. I am already half-way through the outer skirt. I finished the the tunnels for the boning and, already put the boning in. The idea of this skirt was inspired by dresses form 1800's. Mainly it was the back of it that i was interested in. The boning is there to make sure the skirt isn't flat in the back and sticks out. Then I have to saw on separate layers of  black fabric and purple and black netting, this have to be made into frills. i do that by scrunching up the material before it reaches the needle of the sawing machine. The bits that reach the floor and made of only the black material. For this dress I choose a shiny black material, but I made a mistake of choosing the wrong quality; I choose fabric that easily frays, which made it harder for me as i have to hem every bit of the material before I can use it. The inner skirt is a normal skirt that I own, but I'm going to add some more texture to it. 

The corset is a bit tricky as I have to find material that matches the pattern of the original. I was thinking of making it myself, but after comparing the costs, I decided it would be better if I bought it. On average a corset  would cost up to £20, and that is only plain. After getting the corset I would have to customize it to my liking.

The sleeves are going to be made into a little jacket that joins in the back but doesn't go as far as to where the skirt would start, so i would say about mid-length of my back. The end are going to be extended and texturized  with netting or puffy material. 

The headwear is going to be made out of a small hat with crocodile clips like attached underneath. To that black and purple netting and ribbon are going to be added. The ribbons are going to extend to mid-way of the wig. 

Another thing that is need is the wig. It has to be curly. The one I have is a little lighter then this and a bit longer to about my hip. Since I'm not the shortest ever and neither tall (160 cm), the measurements and the lengths or things would suit most people.
 I will update as I make it. ^^ 


Love Ola  :3 

Friday 17 June 2011

Hime Lolita inspired Eye lash holder/board

Recently I've been in a Lolita mood, I have always like but I never tried to be a lolita; Well I did 'dress up' as a Lolita, but that didn't counts as it wasn't done properly. Before my exams started I was really bored, and i decided my bedroom needed some decoration. I made this board out things that i found in my bedroom, so I didn't spend a lot of money on it. It's something that will look pretty :D I also use this to hold my lenses, eye lash glue and eye drops. I use the tweezers to take out the eye lashes I want.

You will need:
  • Cardboard form a drawing pad
  • Pink paper or any other colour of your choice
  • Lace for decoration
  • Ribbons or/and bows
  • See-through packaging or harder plastic bag (not food bag)
  • Sellotape 


1) First, start with a base, for mine I used the cardboard back of a drawing pad. 
I cut it then to the proportions I want. 

2) Next I stuck the pink paper onto the cardboard.

3) Then I turned it around and started to stick the lace at the back, far enough for it to stick, but not as far for it not to show. 

4) Decorate the board with stickers or writing, you can also stick bows or ribbons on the lace or the board. It is for you to decide :3

5) The pockets are more tricky, I made them out of normal see-through packaging I found around my house.
Any hard see-through plastic will do, but don't use anything like food bags, because they are too soft and the effect won't be the same.

In the picture above, I drew arrows to each side, to show you, so you know what I'm talking about.

5a) First cut out a square, the size depends on you and how big your board is, but mine is around 10cm wide and 6cm tall.
Start by placing the plastic square on the board, make sure you have enough space, so when you fold it over itself it won't be out of the board. Place a small pice of Sallotape (red cross section).
5b) Then fold it over itself, fold the bottom a little bit so the pice of sallotape is folded inside. Secure the bottom with more tape.

5c) Squeeze the sides of the plastic square towards the middle, this will provide more space inside the pocket. Secure the sides with sallotape.

6) Stick some decorations on the sides of the plastic squares to cover up the tape.
** For lenses make the square bigger as the lens cases are much bigger.


7) Add more decorations if you want
And you are finished ^^

If you made one yourself and you want to share it feel free to do so <3

Love Ola :D 

Saturday 11 June 2011

GEO Super Angel Blue Circle Lenses Review

I love my GEOs, they are super comfortable. The pattern blend in well with my natural eye colour. I bought these lenses at MCM London Expo in the dealer's room from GEO stall.
Diameter: 14.8mm 
Life Span: 1 year after opening 

As you can see the pattern is really pretty, and even tho the colour looks quite bright it's actually darker when in your eye. 


Comfort 5/5
Super conformable, I can wear the for a whole day without noticing them <3
They are quite easy to put in. 

Appearance 5/5
They look quite natural but not too natural, that people wont notice you are wearing them. 
Simply they are jizzable.

Largment 5/5 
As it is 14.8mm they are quite large and they give a nice enlargement to your eye.
Personally I think they give a really nice Dolly eye effect :D 

I really recommend them ^^ 

Love Ola ^^ 

Tuesday 7 June 2011

London MCM

Last weekend I went to MCM expo in London :L
Saturday:
I cosplayed Alois, I went with my friends who also cosplayed Kuroshitsuji.
in our group there was a Ciel, Grell and Pluto. Later on we met few more people and we joined into big Kuro group <3 And here is some pictures of us :D
Alois and Ciel :D 

Alois likes <3 

(from left) Elizabeth, Sebastian, Alois and Ciel 

Kuroshitsuji photoshoot :D

More Kuro people 

Even more Kuro people 

And the awesome rape xD

Sunday:
On sunday we cosplayed Volcaloid Matryoshka. I was Miku, Arii was Luka and Shannon was Neru. We meet sooo many amazing cosplayers <3 Love you all :D

                                                                          Miku and Luka 

We met other Volcaloids :D


Neru, Luka and Miku 

Love Ola <3